

Instructions
How to Fit a Light Switch Surround
How to fit a Light Switch Surround
How to fit a Light Switch Surround – Designed to be fitted without having to disconnect sockets or switches by trapping the surround between the facia plate and the wall, meaning there is no need for adhesive backing or tapes. They can be easily removed when decorating or changed to match new colour schemes.
For a follow along video guide on How to fit a Light Switch Surround. Check out our YouTube tutorial here.

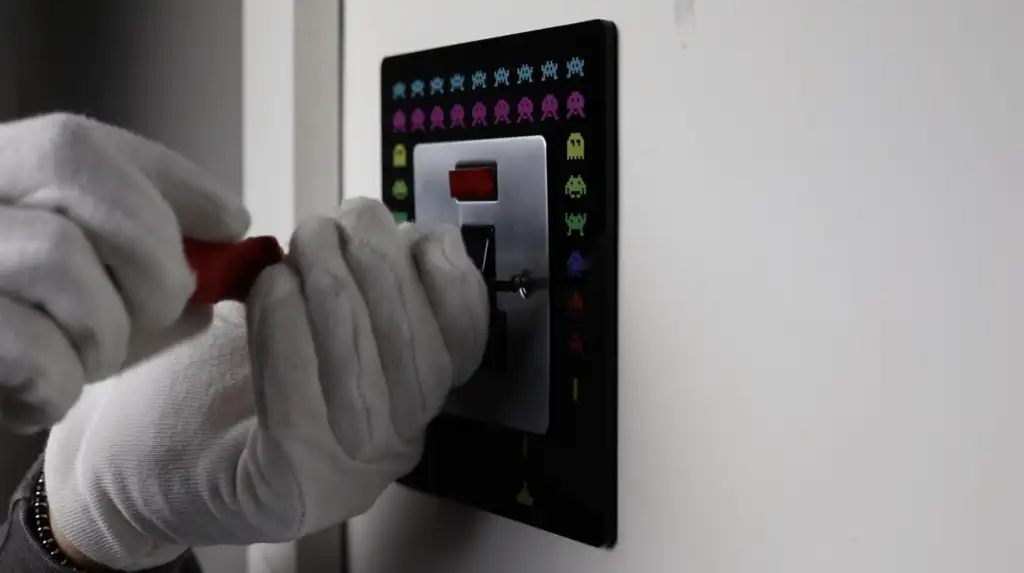
Step 1.
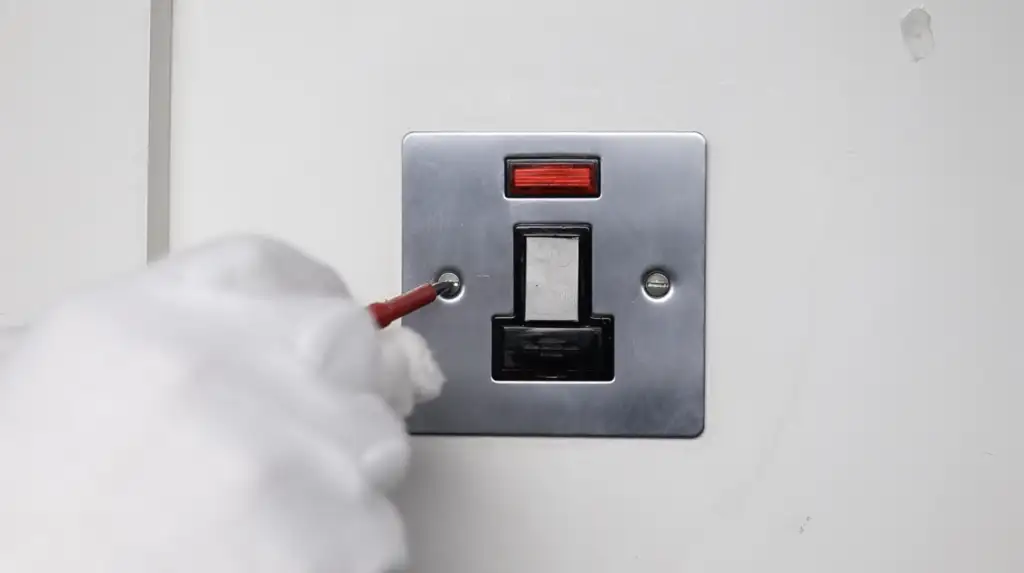
First peel the protective film off of the surround, taking care not to scratch the acrylic. If you have purchased a printed surround, this step will have already been completed. Then, unscrew the facia plate of the socket.
Please Note:
You do not have to disconnect the socket, although take care not to touch the wiring and ensure that there is no power to the socket.
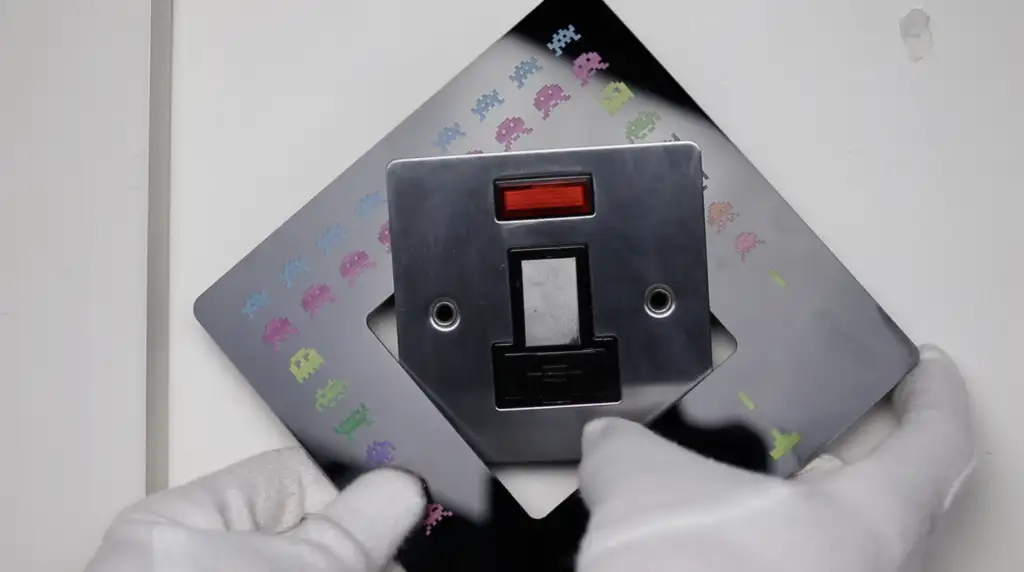
Step 2.
Then slide the surround diagonally (corner to corner) over the plate.
Step 3.
Finally, screw the plate back into place. Trapping the surround between the wall and the facia.
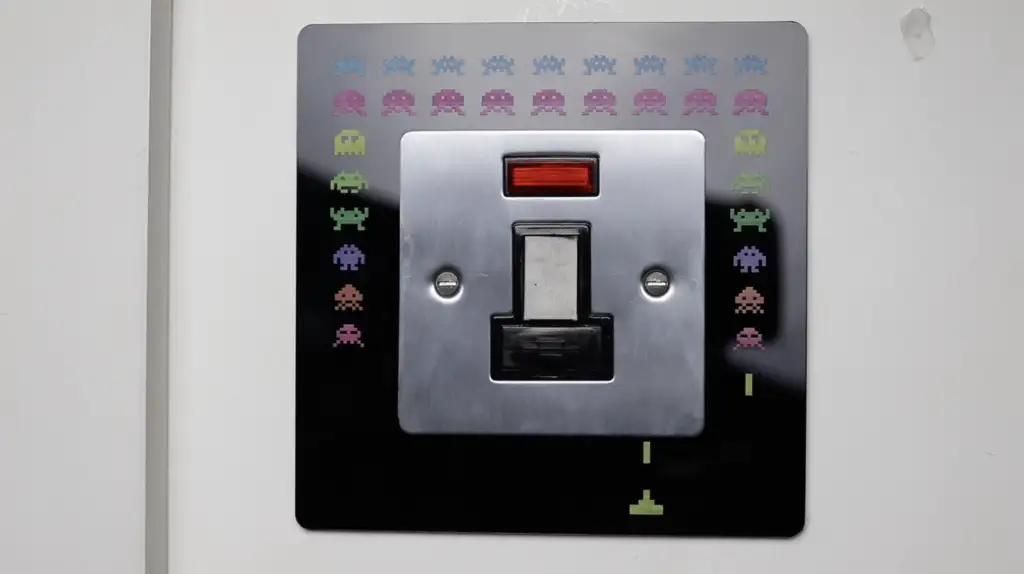
Finished
This then ensures the surround is held in place between the plate and the wall. Then this is complete. These can be swapped by repeating the process. Great for if decorating is updated.
Longer screws may be needed in some instances. Take care not to touch the wiring and ensure that there is no power to the socket during the installation process. If you are unsure please consult a qualified electrician.